If a customer requests a pre-booking, the dealer is able to pre-book an appointment by using Workshop Appointment Management functionalities in VIDA. Pre-bookings are most common for non-Sensus cloud connected vehicles but may in some cases also be applicable for Sensus cloud connected vehicles. A pre-booking may be a seasonal wheel change or any other upcoming workshop appointment need for
Sensus cloud connected as well as non-Sensus cloud connected vehicles.
This procedure describes a scenario when a dealer adds a by customer requested pre-booking in VIDA.
-
A customer is picking up a vehicle from service and agrees with the service advisor to pre-book a date for the next coming
service need.
-
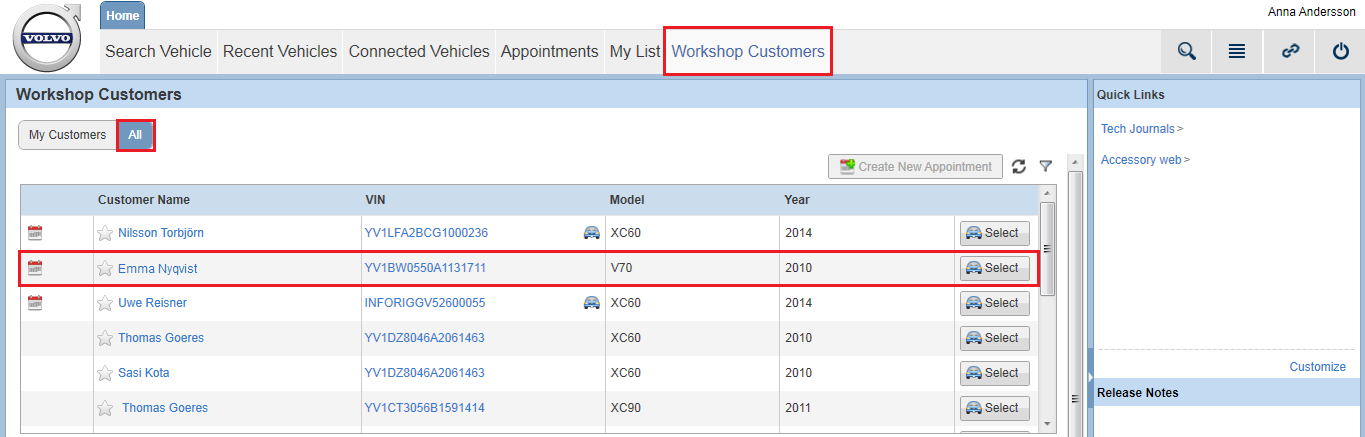
The dealer selects the customer/vehicle in the tab in VIDA.
It is also possible to search for the customer/vehicle and create a new appointment via the Manage Customer Information functionality. Here it is also possible to add a new customer.
-
The dealer selects the customer/vehicle and clicks .
| ð
|
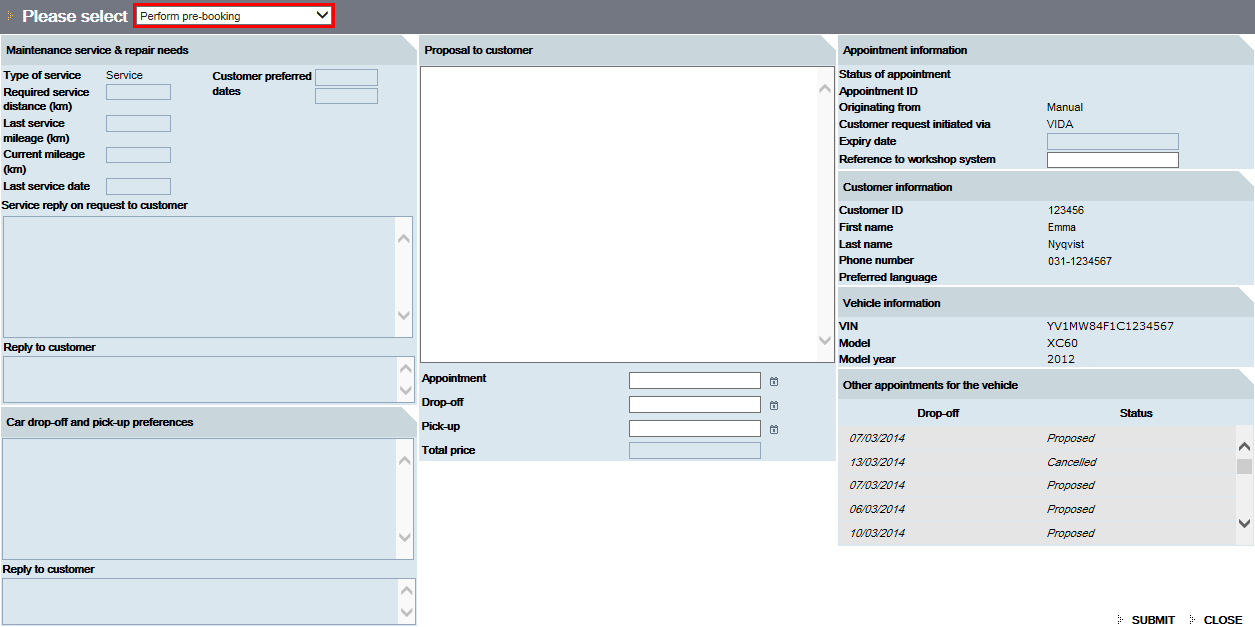
The Create appointment page opens in a separate browser window. The dealer selects from the drop-down menu.
|
| |
|
-
The dealer fills in date, time and work to be done as agreed with customer. The date, time and work do not need to be completely
agreed at this stage. Since it is a pre-booking, the dealer also needs to confirm the content at a later stage.
-
When all necessary fields are filled, the dealer clicks .
| ð
|
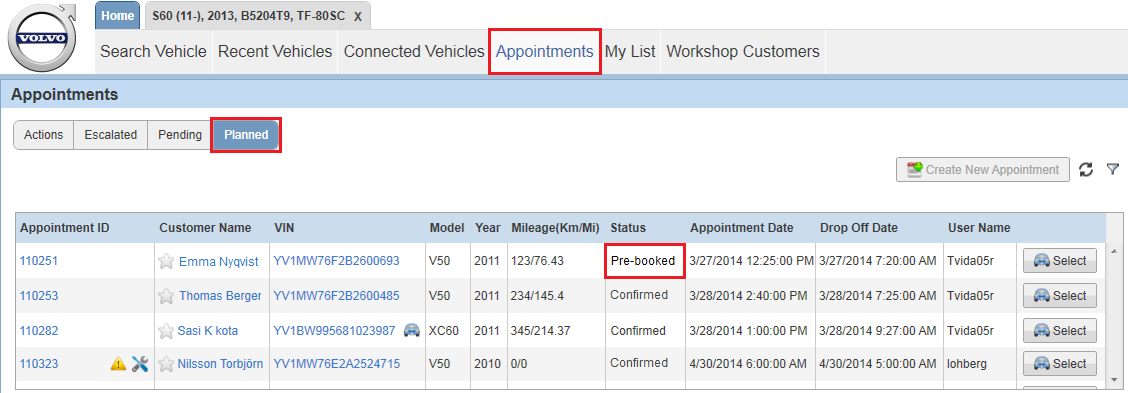
The pre-booking is transferred to the list in the tab.
|
| |
|
-
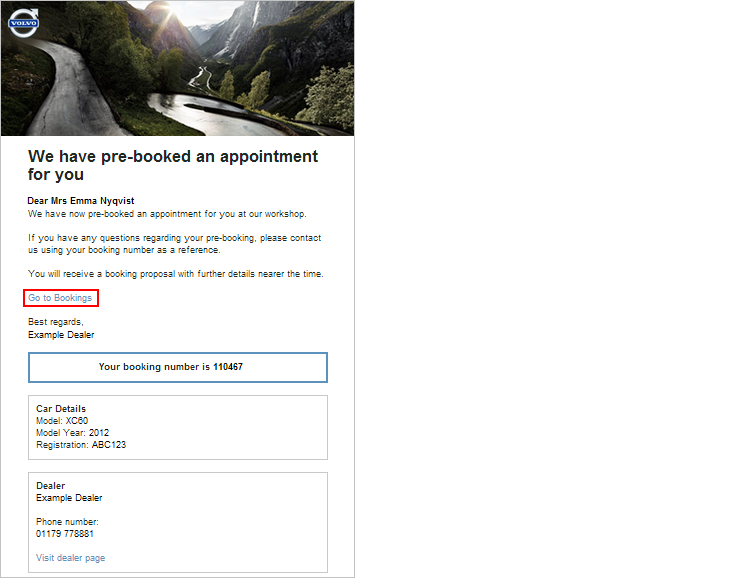
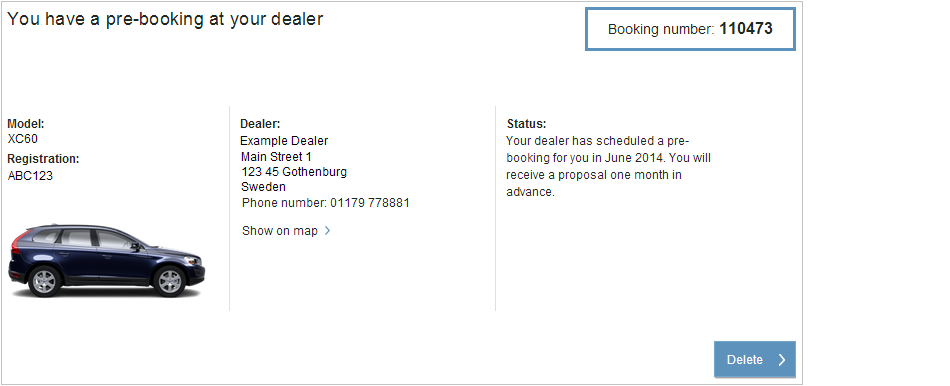
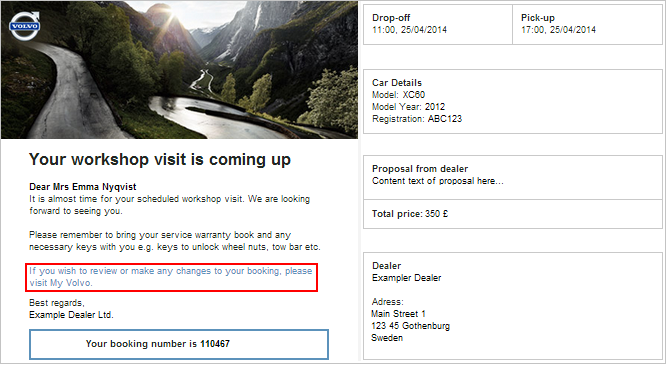
The customer receives a booking confirmation via email and My Volvo ownership website. The email contains a link to the pre-booking in My Volvo ownership website.
Email:
My Volvo ownership website:
The customer can also access the booking details in Sensus Connect by selecting .
-
Time passes and 30 days* before the pre-booked appointment day, the appointment status is automatically set to Requested.
| ð
|
The booking is transferred from the list to the list.
|
| |
* Parameter set at market or dealer level.
|
| |
|
-
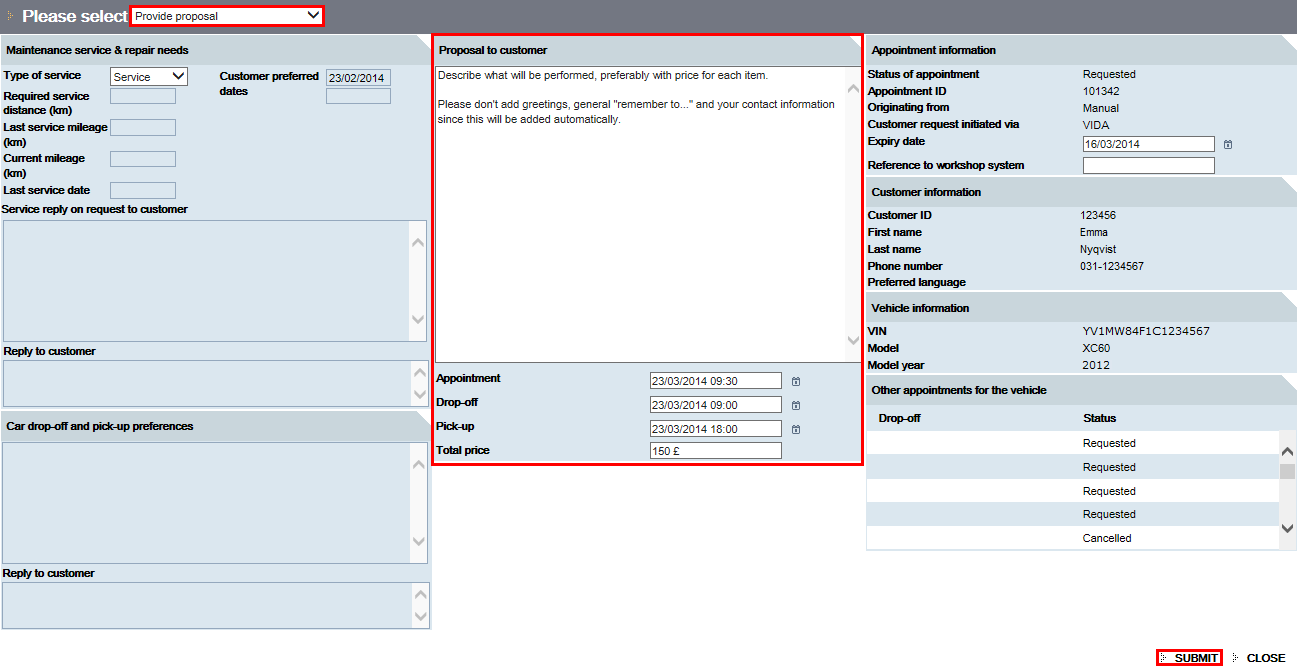
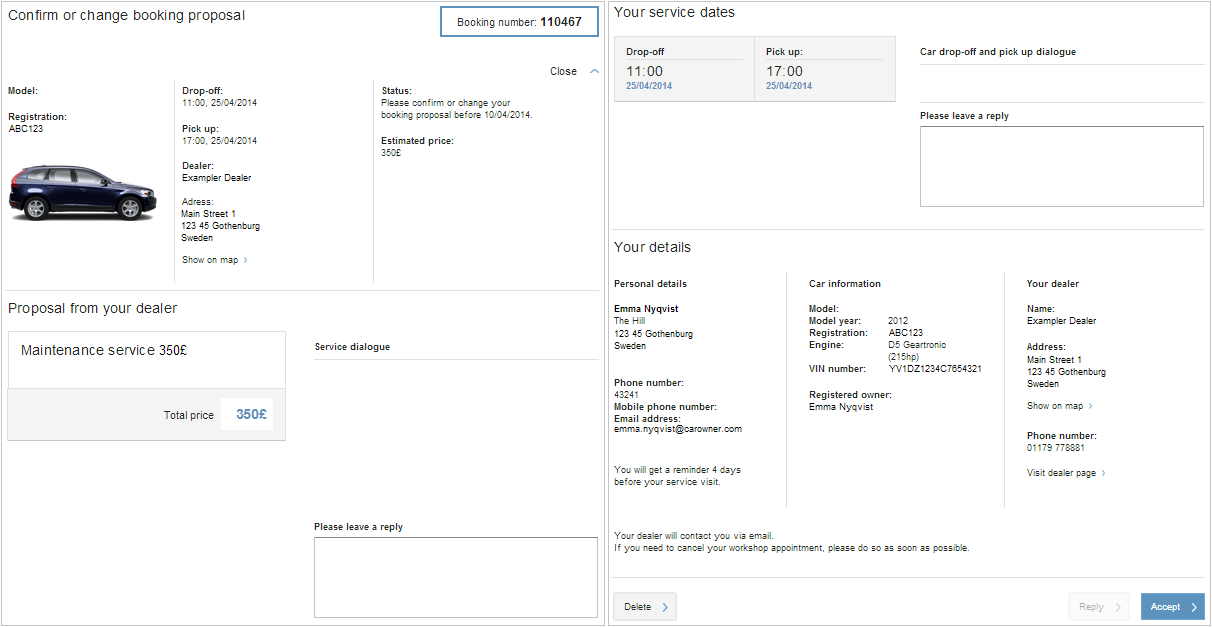
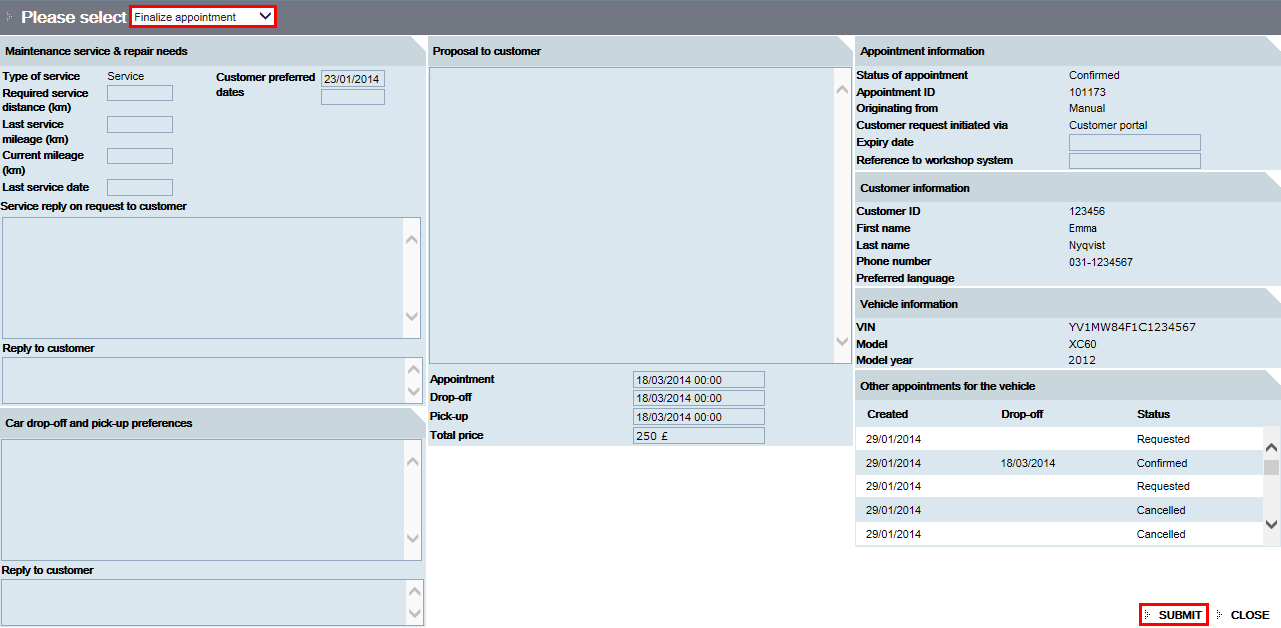
The dealer selects the customer/vehicle in the list and clicks the .
From the drop-down menu, the dealer selects . The details regarding the planned appointment, time and cost are already entered but the fields are editable if something
needs to be changed.
When everything is filled in, the dealer clicks .
-
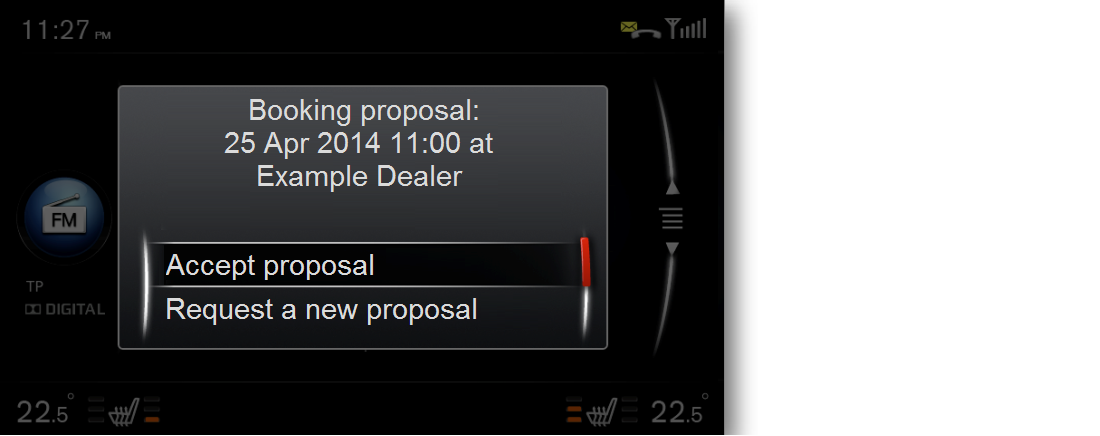
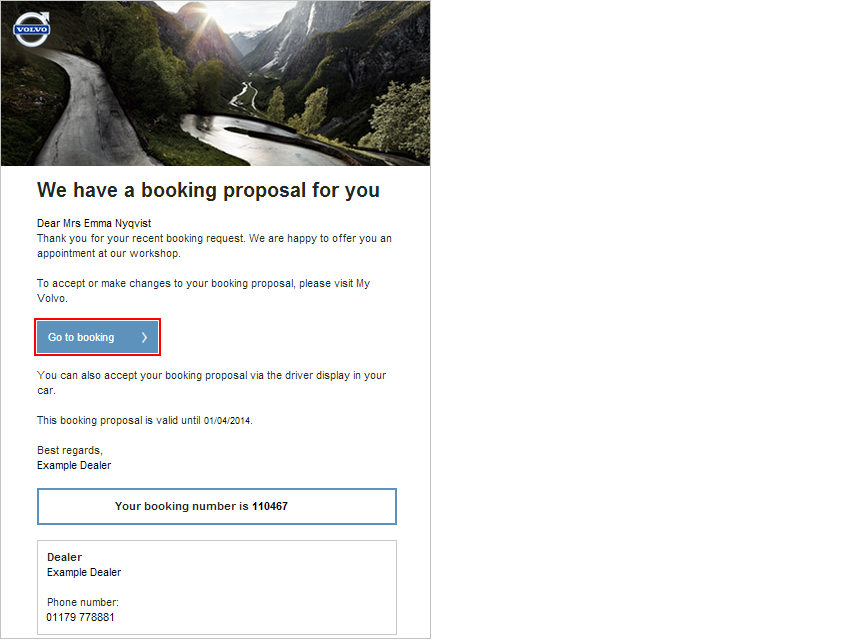
The customer receives the proposal in the following ways:
Via Sensus Connect in the vehicle:
Via email:
Via My Volvo ownership website:
Note
At this stage the customer is able to request another time slot, via Sensus Connect, My Volvo ownership website or by calling the dealer. This requires the dealer to access the workshop planning system again to look
for another feasible alternative day and time for the customer's workshop appointment and send a new proposal to the customer.
-
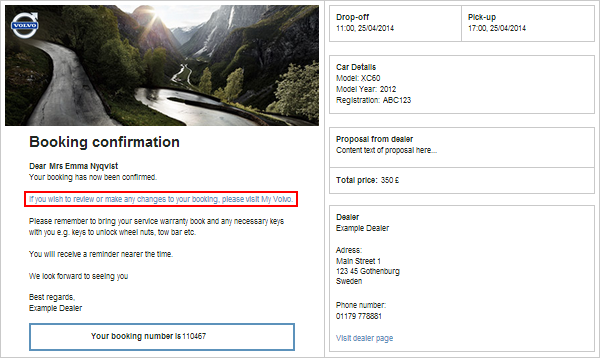
The customer is happy with the proposed date, time and price and accepts the proposal via My Volvo ownership website.
-
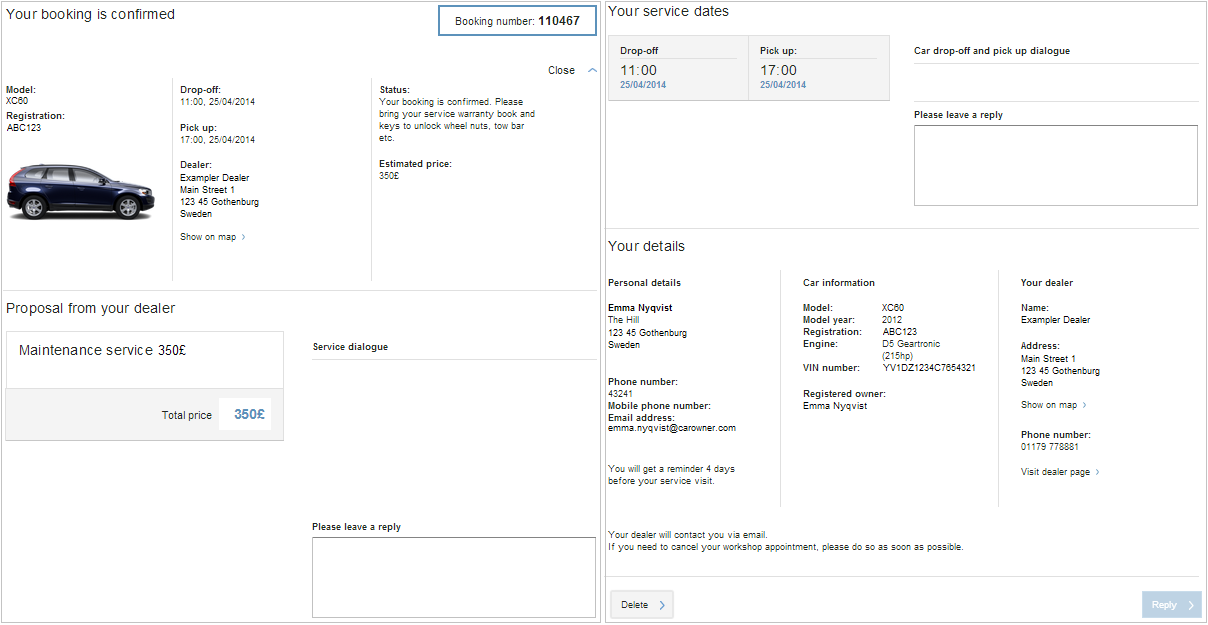
The customer receives a booking confirmation in Sensus Connect, My Volvo ownership website and by email, confirming that the response was successfully sent back to the dealer. The email contains
a link to the booking at My Volvo ownership website.
Note
Steps 11-14 are identical with the procedure previously described in steps 18-21 in Scenario 1.
-
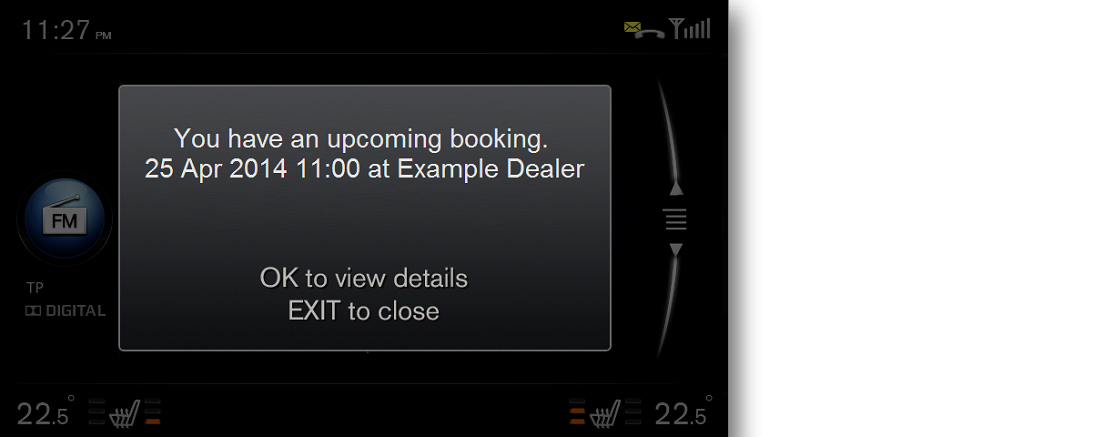
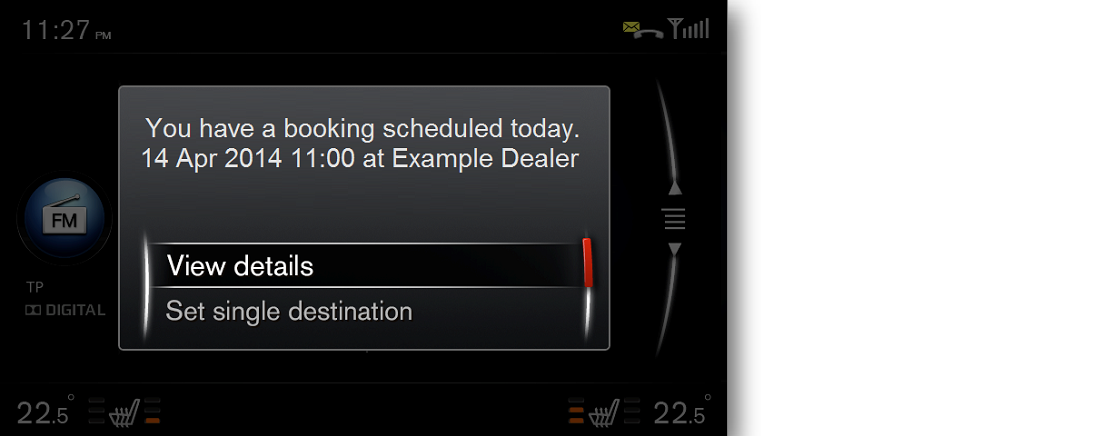
Based on customer settings in My Volvo ownership website, Sensus Connect will display an appointment reminder to the customer 1 to 4 days before the workshop appointment. This reminder will also
reach the customer by email. The email contains a link to My Volvo ownership website.
Via the pop-up reminder in Sensus Connect, the customer can see the details of the appointment by selecting to view details.
The customer can also access the booking details at any time in Sensus Connect* by selecting , or by following the link in the reminder email to My Volvo ownership website.
* The details about work to be done on the vehicle, coming with the dealer proposal, cannot be seen in Sensus Connect. Only price will be displayed here. Full details in Sensus Connect will be introduced at a later stage.
-
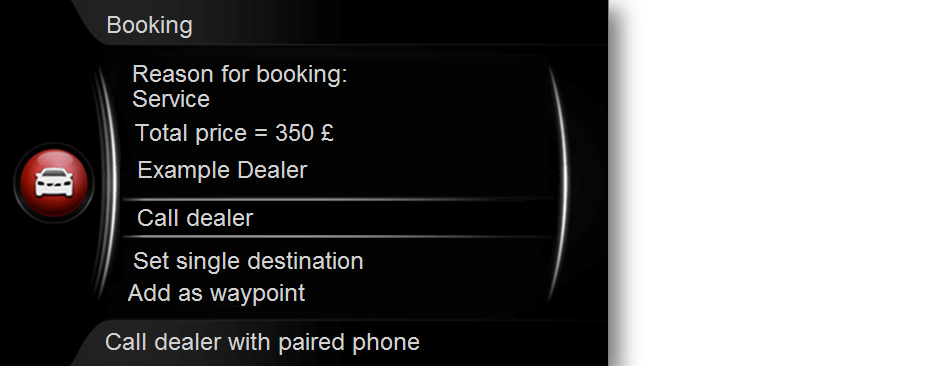
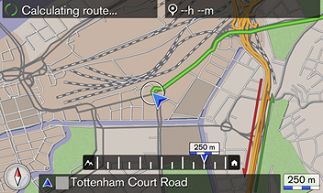
On the day of service, Sensus Connect displays another appointment reminder to the customer, every time the engine is started. The customer is able to view the
details of the appointment via this reminder as well.
If the vehicle is equipped with Sensus Navigation, the customer can choose to be directed when driving the vehicle to the workshop. There are two options for this guidance,
set as single destination or to add the dealer as a waypoint.
-
When the vehicle arrives at the workshop, the technician performs the work on the vehicle according to what has been planned
and agreed with the customer.
-
As a final step, when all work is completed and the vehicle has been picked up by the customer, the dealer opens the tab. The dealer then selects the customer/vehicle on the list and clicks the . The dealer closes the case by selecting from the drop-down menu and then clicking .
| ð
|
By doing this, the appointment is removed from the list but the customer/vehicle is still available in the tab if the primary driver of the vehicle has selected the dealer as preferred dealer.
|
| |
|
| |
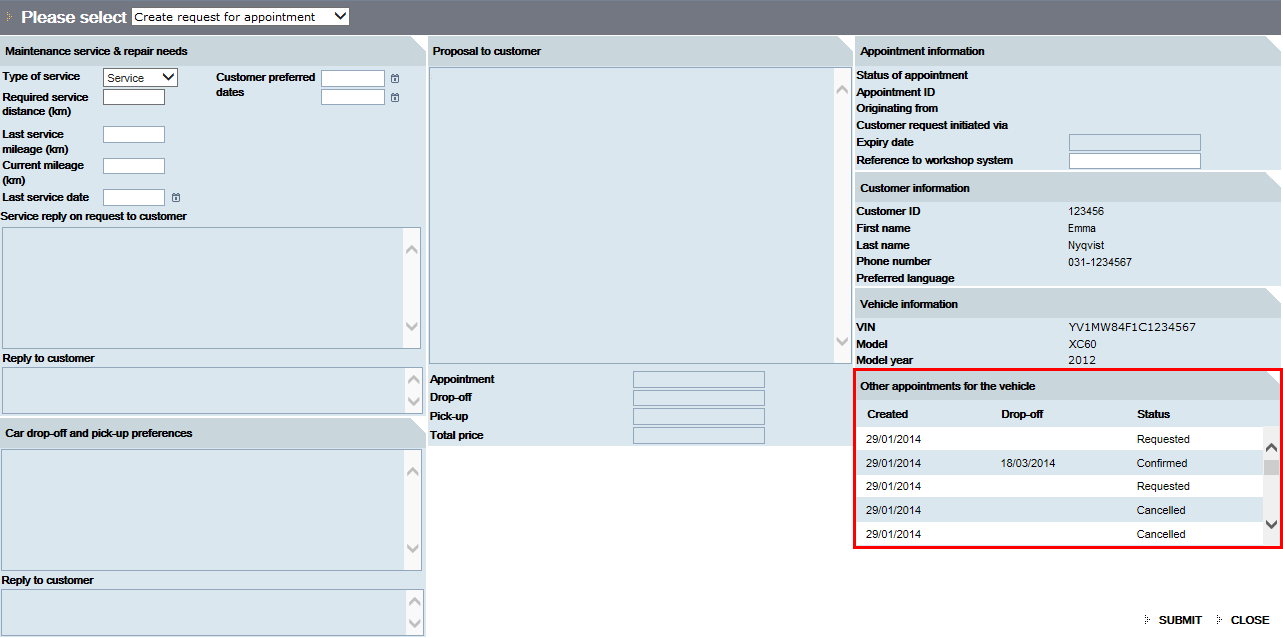
All information about earlier appointments is available in the overview of appointments on the Workshop Appointment Management pages.
|
| |
By clicking a row in this overview, the page is shown as it was at selected time.
|
| |
|